Showing posts with label Stampin' Creations. Show all posts

Thursday, August 02, 2012

Abigale's 2nd Birthday~ Japanese Theme

{Dress by Grandma}
I was an exchange student to Japan in 1993, the summer before my senior year of high school. It was an amazing experience. Since I never throw anything away, I had lots of mementos from my time there, of course.  
While walking around EPCOT last year and strolling through the large store in "Japan" there, it came to me what theme I wanted to do for Abigale's 2nd birthday.  I already had the decorations, the theme easily leads to yummy food, & some of the authentic favors could be obtained in the shop there in EPCOT.  So rather than Elmo or the obvious "Abby Cadabby", I opted to go Japanese while I was still in control of her birthday themes.  Hah!  {Note: Minnie Mouse is the 3rd birthday theme, so I was right in claiming control while I still could. ;) }
Invitation created using My Digital Studio from Stampin' UP
{Compilation shot of some of the ideas}
For the food, I made most of it with sauces I got from the Asian section.  We served a veggie tray, featuring Edemame, Rice Krispy "Sushi", "Tokyo snack Mix" I picked up in EPCOT's Japan, Potstickers {one of my favorite foods when I lived there}, Yakisoba noodles {similar to Lo Mein}, and Yakitori {grilled chicken on a stick}.  For dessert, I made 3 different cupcakes: Strawberry Limeade, Chocolate Cupcakes topped with Chocolate Ganache and Japanese cookies {from EPCOT}, and Coconut Cupcakes.  Some of the food missed the photo shoot but you get the idea. ;)


I made the banner & other little signs using My Digital Studio and punched the shapes using my Big Shot all from Stampin Up {of course}.
I found the fonts "Last Ninja" & "GoJuOn" on one of the free font sites and downloaded them to use with all the signs.
For the decoration areas, I got a few books from the library and most of the rest were items from my time there as an exchange student.  I was able to borrow a few Asian items from a friend that had hosted a Chinese exchange student, too.  

I used take out boxes for the boys favor boxes. I bought them from our local Asian take out for a steal!  The little Asian purses were actually scored 6+ months in advance from the Dollar Tree, if you can believe that!  They were filled with candy from Japan/EPCOT and little toys with an Asian theme I ordered from Oriental Trading under their Chinese New Year Theme. 
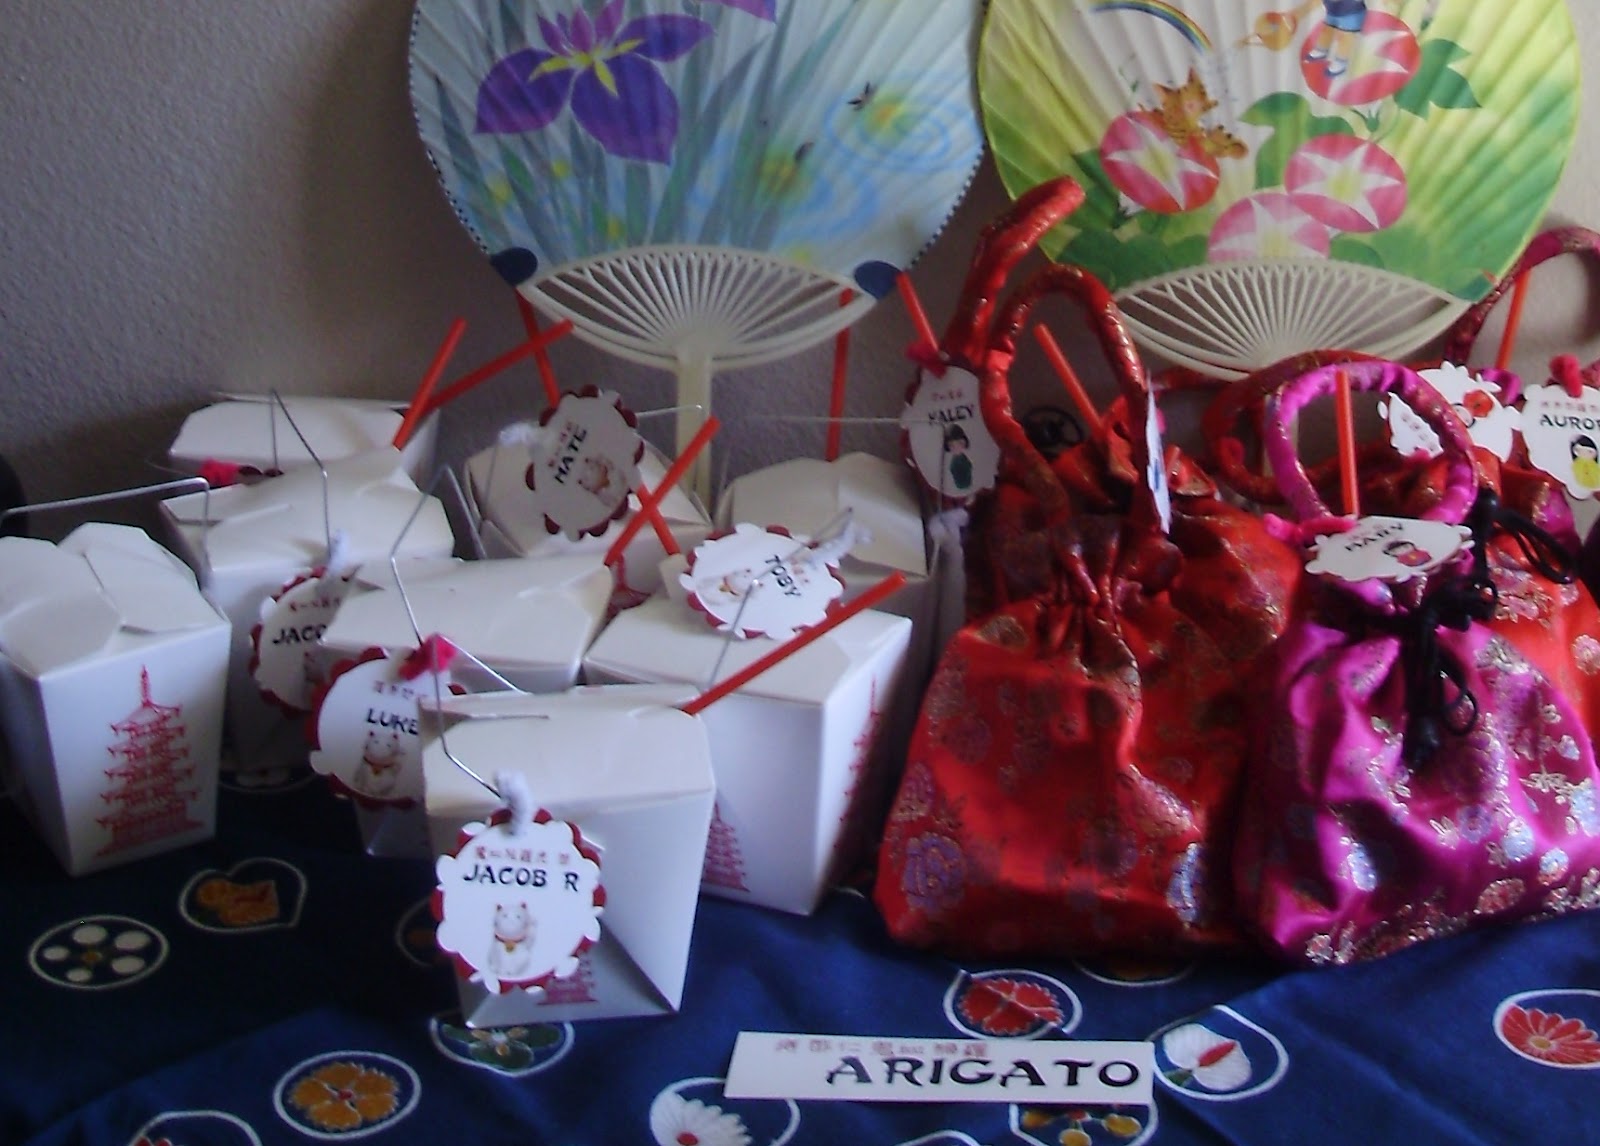
I made tags for each kid with their name in Japanese and a little Japanese character.  Arigato means Thank you.
We asked friends to dress up in Asian style clothes if they happened to have them and our friends happen to have coats from their Chinese exchange student that worked perfect!

Time to blow out the candle, little lady!

Mommy, Daddy, & little Abigale

YUM! 
Hope you enjoyed looking at our pictures as we remembered the fun we had with family & friends celebrating Abigale's 2nd birthday.  Our world {and her personality} changed one month later with the addition of her little brother, Johnathan, but that is an entry for another time.
Thanks for looking!
{Japanese for goodbye!}
All crafty supplies used to make the various signs are available at my website, www.AmyDearie.StampinUp.net.

Thursday, April 26, 2012

Letters not sent..

Am I the only one that creates Christmas cards, addresses them & all that, and never quite sends them out?  
I have some from last year, lots from this year, and not too long ago, I found a batch of Christmas cards not sent from 1998.   
I do not mean to be negligent in my greetings.  I have every intention of sending them out.  Can I tell you how many thank you notes I have found written and not sent.  So if you have not received the Thank You note for a gift for Jesse {mind you from 2007}, please do not judge me.  I wrote them, then lost them, then found again much too late to send, I assume.  Yet, I still continue to create them & write them and, yes, I am still working on the current babies & birthdays... 
This year I even handmade little photo books for various relatives.  You guessed it, only a couple were given out.  And, of course, now the photos of us are missing someone, so they are kind of out of date....ugh.
Maybe, one day, I will send a large envelope out to my friends that will include all the correspondence I *meant* to send.  So don't be surprised one day if you receive 3 or 4 Christmas cards, a few Thank you Notes, printed pictures from now & years back, and let's not forget those baby announcements I work so hard on designing, then print and never send. 
So until that package arrives, enjoy this *possible* announcement for our #3.  See it hasn't been perfected & printed quite yet...maybe this time they really will get sent.
Maybe.


I am just including this print I *might* get made of the beautiful shot that my friend & fantastic photographer took, K.Barber Photography. 
If you know who the quote is from, let me know, too.  I got it from a baby border on MyDigitalStudio.
Thanks for reading!
Photo by K.Barber Photography

Tuesday, January 24, 2012

Argh Matey Jesse's Pirate Birthday Party

Jesse turned 4 on November 8th, 2011.  I love themes.  They inspire me!  I got inspired for this party when Stampin' Up clearanced the Pirate Party kit from a couple of years ago down to $2.99 last spring.  At the original price of $16, it was a bargain, and now they were practically giving it away!  
Little did I realize the Pirate theme was going to be so popular this year.  So much for being original.  
But here are my little spins on the theme and what we did for his 4th birthday party.

His Invite {created on My Digital Studio from Stampin' Up then just printed as a 4 X 6 picture at Sam's!}. 
Picture of Jesse was taken by Nate Mundell Photography at another Pirate {& Princess} party we attended a month prior.
First, our tradition is to go to Walt Disney World on our birthdays since we have passes.  Had to take a few "pirate shots" while we were there!

 I did a "Candy Barge" on a taller dresser and had bags for the parents to fill for the kids. I tried to get candy that was either wrapped in gold or jewel tones or sea related. 
The sign that read "Beware Thar Be Pirates" was made by my husband from a pallet broken apart and rough looking on purpose.
The banner hanging is 2 kits put together and then I embellished with chunky glitter to add a little something to half of the flags.  I also hung another of this banner over our sliding glass door that lead to the bounce house. Sorry, it's no longer available for purchase.
My mom made the costumes for my 2 littles.
 The "Pirate booty" came from random metal items mom or I had laying around, along with the wooden boxes and gauzy material. When draped together with the beads and such, it reminded me of the Pirates of the Caribbean ride at the Magic Kingdom, which is the look I was hoping for in this area.

 The girls had headband bandannas with red polka dots and the boys bandannas had a pirate print.
The treasure boxes also came in that kit from Stampin Up.  Since I had so many kids coming, I put out tags for the parents to tape to the treasure boxes.  This didn't happen.  
And the boxes kept {mysteriously} opening to be pillaged.  
So I wouldn't recommend having the boxes within children's reach or untagged.  
If you want the name on it, put it on.  {What was  I thinking?}
I like to name the food served with the theme because I am that cheesy.  So we had "Submarine Sandwiches" {and yes, I know that subs are more current than the typical time period when we think of "Pirates" but go with me..};  Deviled Ships {Deviled Eggs that kind of resemble a boat thanks to the flag from the kit}; Pirate Booty ~of course; and Shipwrecked Salad made with Sea Shell Pasta. 

Pictured here is also the Salted Caramel Cupcakes {Salty Sea..get it?}.  I loosely followed the inspiration of this recipe.  But I used a normal yellow cake mix with a pinch of salt and used a jar of caramel ice cream topping for the filling.  I did use her recipe for the frosting.  Great stuff!
The Treasure Chest Chocolate Cake turned out pretty good despite me waiting to the last minute.
 I didn't really do games other than the "Search for Buried Treasure" using an under the bed type storage box filled with a bag of sand, beads, rings, & other small trinkets.
We asked the kids to wear pirate gear if they had it and some of the girls wore princess outfits, too.  We provided the bandannas & eye patches in case they didn't already have something. Dress up always makes it more fun and I love to incorporate that for the guests and {of course} the party honoree!

Friends let us borrow their home bounce house which gave the kids another outlet to play.  Highly recommend!
Jesse had a great time and I think the kids did, too.
Click Here for my Pinterest Board I used to collect my inspiration.
Let me know if you have any questions and thanks for looking!

Tuesday, September 13, 2011

Magnetic Chalkboard with Memo Clips ~MOPS Creative Activity

Our MOPS~Mothers of Preschoolers~ group meets every Tuesday during the school year.  We have a "Creative Activity" or craft every other week for the most part.  We average 80-100 women which makes the task slightly difficult of finding & creating a craft for that many people to complete within 15 minutes, at lots of different levels of crafting ability, tons of different tastes, and did I mention on a super tight budget?  What one person, 10 people and 100 can create differ greatly.
But, to say all of that, I am excited to share what we did as our first real creative activity.  
I am giving all the steps in case 1.) You wanted to make more yourselves. Super easy and inexpensive gift for teachers, coworkers, etc. 2.) Other MOPS Creative Activities ladies might want an idea for their group.
So, first, the final product:


And, now, how we got there.
Supplies:
Clothespins
Neodymium Magnets {SUPER Powerful!}
Large Burner Covers
Can Black Matte Spray Paint
Quart Black Chalkboard Paint
Crop-a-Dile to poke the holes and a metal file to file holes
Wide Ribbon
glue
Chalk to season/prime.
200 Clothespins
I decided to glue the magnets on because they were so tiny I feared they would get lost. And they were so strong, if the board was slightly touched, they all snapped together like a mousetrap or domino affect, which Jesse found quite funny!
100 ribbon loops to hang the chalkboards with!
I used 3 kinds, honestly, because I bought the first 2 striped ribbons from Stampin' Up to coordinate with the Designer Series Paper and under estimated the amount I needed. 
I pre-cut, knotted, & sealed the loops with glue. I knew it would take a lot more ribbon if they tied the knot themselves {budget}.  And frustration isn't fun for those that don't like to tie ribbons.  Also, time is always a constraint. 
I cut the paper to be glued onto the clothespins from a retired pack of Designer Series Paper.  It is double sided so there is a choice of designs but they all coordinate along with matching the ribbons.  
3/4" X 2 3/4" strips times 200+.
I packed them in groups of 8 kits for each table to make sure everyone had enough supplies and they are easy to find.  I emptied them into our little black buckets for ease of delivery to each table the morning of MOPS.

I only have 1 Crop-a-Dile, so this is another step in the prep process that had to be done at home.  Since the ribbon I chose was wide, it took 3 holes. Then it left sharp edges, so I filed them with a metal file.
I lined them up in a box and spray painted the sides matte {to match the matte-ness of the chalkboard finish}.  Just turned them 3-4 times to hit all the side.
Ready to roll the chalkboard paint on!
1 coat.
Painting complete.  Now all stacked and ready to take to MOPS. 
The coordinating factor is my fave part of this project.  Oh, and the usefulness.  :) 
I hope the ladies at MOPS @ the Mall enjoy them!
Note: If you desire to know the location these supplies were purchased or you are a MOPS C.A. person and want to know Cost-Per-Person, please message me.  Happy to help!

Monday, April 18, 2011

Need an Easter Gift?

Here is the link to the whole Facebook album that you should be able to view, even if you aren't on FaceBook! Here are a few shots that you will see in there with details!


{I posted a longer version of this post on my business site, DearieDesigns.}
 Contact me with questions!  Thanks for looking!